Showing posts with label Wind Turbine Guide Full Pack. Show all posts

Wednesday, 3 August 2011

How does my wind generator work?

How does my wind generator work?

Every wind generator, whether they produce enough energy to power a city or to power a small radio, works on these same basic principles...
    1. The wind blows
    2. The generator's vane (tail) causes it to turn into the wind
    3. Blades attached to an alternator/generator experience the force of lift and begin to spin
    4. The spinning creates electricity for us to use directly or to charge batteries

Sounds pretty simple eh? Well, then how the heck do I build one? Read on...

Tools Required

Surprisingly, building a simple wind generator only requires very basic hand tools, and if you are desperate you won't necessarily need all of them. I used...
  • Jigsaw (or a hacksaw and a lot of determination)
  • Drill
  • (2) Drill Bits (1/2", 7/32")
  • Tape Measure
  • Crescent Wrench
  • Pipe Wrench
  • Protractor (to measure angles for the hub)
  • Sandpaper (various grits)

Parts Required

I wanted to be as minimal as possible with my design (I'm poor), so I took the already simple designs from around the web and made them even simpler. All of the parts are available at any local home improvement or hardware store, and the entire setup can be constructed in as little as a weekend. Many of the parts you may already have lying around, and lots of substitutions can be made (instead of 1" steel pipe for the tower, you could use an antenna pole for instance). Here are the parts I used to build my generator...
  • 10" x 14" Steel Sheet
  • 10" x 1/4" Steel Nipple
  • 1-1/4" Floor Flange
  • 36" x 1" Square Tubing
  • 1/2" Bore Circular Sawblade (for hub)
  • 5/8" x 1/2" Arbor (to attach sawblade to motor shaft)
  • (2) Metal Straps
  • 8" x 4" PVC Pipe
  • 30" x 8" PVC Pipe (6" pipe works well too)
  • A DC Permanent Magnet Motor (preferably Ametek 30V or 260V 5A treadmill motor)
  • (8) 1/4" Bolts (with washers and nuts)
  • (2) 1/4" Sheet Metal Screws
  • 10-40 Amp Diode (the bigger the better)

All of the above parts (with the exception of the motor), can be picked up in a single stop to any large hardware or home improvement store. For the motor, the most popular types are old tape drive motors manufactured by a company called Ametek. The key is to finding a motor that puts out the highest voltage per RPM. For instance, the Ametek I'm using is rated for 30V at 325 RPM, making it excellent as an electricity generator (for a nice output comparison of the Ametek motors commonly found on eBay and other sites see TLG Windpower). However, pretty much any permanent magnet motor with a good volt/RPM ratio will do. Keep in mind that if you want to generate useful electricity, you will need to produce at least 12V to charge deep cycle batteries or run an inverter. My setup can easily achieve 300-400 RPM in a pretty average wind (for Oklahoma). These instructions assume an Ametek motor with a 5/8" shaft, but can easily be adapted to other motors (search ebay for "wind generator" and you will get a listing of lots of good motors).

Blade Construction

Arguably, the most important part of a wind generator are its blades. A lot of people like to carve their own blades out of wood or composite materials. However, for the rest of us, it's quite easy to make a good set of generator blades from common PVC pipe (and the efficiency isn't too bad either). A 2-3 foot section of either 6" or 8" PVC pipe will do the trick. Before we go any further, here are a few blade theory quickies...
  • The longer your blades are the more "swept area" you have to gather energy from and easier your blades will spin in low winds, but the slower your rotation speed will be
  • The tips of the blades always spin faster than the base, therefore one needs to take into account the "tip speed ratio" (TSR) when designing blades (there is a reason why old farm windmills will spin all year long at 40RPM)
  • The power that can be extracted from the wind increases by the cube of wind speed (something like P=k*v^3 k=constant of wind generator, v=wind velocity)
  • According to the Betz Limit, only about 59.3% of power can be extracted from the wind (so in reality P=.593*k*v^3, assuming k accounts for mechanical inefficiencies in the generator motor)
  • The higher you get the generator off of the ground, the more wind it will be exposed to (the general recommendation seems to be 25-50ft., but I've had decent results at just 12ft.)

Cutting the blades for this machine is very simple. You will need to cut your PVC pipe into 3 sections, two 150 degree sections and one 60 degree section (I've attempted to illustrate this VERY APPROXIMATELY in my favorite CAD program--and by CAD program I really mean MS Paint). The red lines are cut marks. You will want to use a good tape measure and possibly some construction paper or newspaper to mark everything before you cut. The 150 degree angles will result in wide blades that start up in lower wind speeds, however this will lower the shaft turning speeds. In practice, you will find that the optimum angle could be anywhere from 75-150 degrees. The best idea is start out with a wide set of blades that you can always thin out later if you need to. Remember, measure twice and cut once!
pvc blades pvc blades
After the blades are cut, I like to go ahead and smooth out all of the edges. If you want to follow aerodynamic theory, you can round the angled (leading) edge and flatten the straight (trailing) edge, but in practice I haven't seen this make much difference with PVC blades. So, you should end up with something roughly like these...

pvc blades

Hub & Blade Assembly

The next obstacle is building a hub to attach the blades to. There are many types of ways that this can be done. I have used circular sawblades and scrap steel disks. I recommend the sawblade approach, as they are readily available and easy to drill through. You can pick up an arbor with a 5/8" or 1/2" shaft at any homestore that will attach directly to the sawblade. Using the 1/4" drill bit, you will want to drill 3 sets of 2 holes 1" apart which each set 120 degrees from the next (this is where the protractor comes in handy, unless of course you are a Euclidean purist in which case you probably don't need a protractor). Here is a picture to make it more clear...
hub drawingIt's a pretty simple idea, but circular sawblades have worked out very well for me as hubs. Be sure and get some sort of rubber covering for the tooth edges and/or file down the edges as best you can, because the last thing you want is a hub of death flying at you if your generator decides to rip apart!
After our holes are cut out and we are confident of our safety procedures, we attach the blades to the hub (note that the hub pictured was cut from scrap steel, more pictures to come later)...
hub with blades


Tail & Pivot Assembly

Now we need to build a spinning platform for our generator motor to rest on. To achieve this, we will use some square tubing, a pipe nipple, flange, and small sheet of steel. Here is my "CAD" draft of what I wanted my tail & pivot assembly to look like, and a real picture of some of the parts I used...
wind generator drawing
wind generator materials


First, I recommend cutting the sheet steel with a jigsaw into a nice design for the the tail (Note: this step is quite unneccessary and ONLY for aesthethic reasons).

wind generator tail material


We then want to make a cut down the center of the square tubing. The length of the cut isn't that important, but I recommend about a 9" cut (this will help make balancing easier later on). We may then slide the tail metal into the hole and use the 1/4" drill bit to drill and attach the tail to the square tubing.

wind generator tail assembly


We will then want to cut out a weather covering for our motor. A piece of 4" PVC slips perfectly over the Ametek 30V motor that I use. I cut it out like so (note the side hole for the motor wires).

wind generator weather covering


Then we go ahead and paint it all up to seal everything from the elements. I wouldn't recommend painting on your front porch like I did though...

wind generator painting


After everything is painted, we can now put it all together. Take the floor flange and put it under the square tubing about 6"-7" from the head. Mark the holes and drill them out with the 7/32" drill bit (or any bit close to but smaller than 1/4"). Attach with the 1/4" sheet metal screws. Use the metal straps to secure the motor and cover assembly, screw on the pipe nipple and you should have something like this...

wind generator assembly


Tower Assembly

Every wind generator needs a tower. I built mine from some pipe fittings from my local hardware store. If you already have an antenna pole or electrical conduit lying around, then you can skip this section. Here is my recommended parts list for a small extensible tower...
  • (2) 5' Sections 1" Pipe
  • (1) 1" Pipe Coupling
  • (3) 1" Pipe Elbows
  • (4) 18" Pipe Sections
  • (2) 12" Pipe Sections

The tower base is pretty self-explanatory. Just hook up the elbows and pipe sections to create a base similar to this...

wind generator tower


From there we can attach the 2 5' sections of pipe together to form a nice strong mini-tower for our generator to sit atop...

wind generator on tower

Finished Product

Now we are ready to attach the blades to the motor shaft with the arbor. You will also want to go ahead and attach some wire to the motor and run it to a device to power or a bank of batteries etc...

fully assembled wind generator


Here is a picture of the experimental design using six blades. It would spin in practically no wind, but would never get past 100RPM. At least it looked interesting!
six blade wind generator


Here is the battery bank I'm feeding into in parallel with solar panels. I am just using two 12V marine deep cycle batteries that can be found at any place that sells car batteries. I keep them in a standard plastic tub with a hole cut in the sides for 12V fans I cannibalized from a couple of old Mac G4s (not pictured). Be sure and put a diode between the battery and the generator so that current doesn't flow from the battery to the motor.

wind generator battery bank


It turns out, cutting the blades a little thinner works better for my area. So I used the large white blades from the previous picture and thinned them out a bit. This resulted in the fastest shaft speeds as seen in first video at the top of this page.

homemade wind generator

Thank You

How I Built a Wind Generator

How I Built a Wind Generator in My Backyard for $150

Lately I've been spending a great deal of time working on ways to generate my own electricity. It isn't a necessity for me yet, but someday being electrically self-sufficient could really come in handy. My interest started a while back when I stumbled upon a how-to article on building wind generators from treadmill motors and PVC pipe. It sounded easy enough, so I decided to try and design my own. This particular design can be built for $100-$150 if you are thrifty and can regularly generate 50-250 watts (considerably cheaper than a solar panel of similar power output). Here's how I built it for those of you who are interested. Additionally, please check out my new frequently asked questions page for more information not discussed in detail here.


Videos
This website has been created to chronicle the building of my 17' diameter wind turbine.
  
Background...
In the fall of 1999 I moved to a rural area of West Virginia, named Terra Alta (high earth). To be honest we live at the *top* of Terra Alta, our house is at an altitude of 3000' where we have a panoramic view of about 270 degrees for up to50 miles!
Besides the wonderful view we also have wind, lots of wind!
So why not harness some of this to generate our own electrical power?
Typically I research the heck out of stuff, and this project is no exception! There is one website that I have found to be *the most* informative site (OtherPower). I have decided to build a wind turbine that closely resembles their 17' diameter unit, the main changes that I will be making is some slight modifications to 'beef' up the metal structure in a couple of places, otherwise it will be the same. This turbine is of the axial flux design. I want to output 2-3kwh in a 20mph wind and have found that this one should suit my needs.
Post note: they have redesigned and rebuilt their 17' turbine and it now is capable of putting more power! The structure of it closely resembles their larger 20' wind turbine.
Some good informative reading "The Bottom Line About Wind Turbines", this is a good place to start out to help you determine if a wind turbine would suit your needs.
Commercial Possibilities...
There are more and more commercial business that are involved with 'green' power'. If you have any doubts in your abilities to make your own wind turbine then either seek out a workshop (the guys at OtherPower.com have them) or purchase a commercially available unit. Many wind turbines are now available that output anywhere between 400-3.5kwh, with price and size being the major differences.
Roll your own...
I made the choice to make my own wind turbine. There were a number of factors that influenced this decision: 1) I have the skill sets 2) I have the tools 3) I have the desire 4) No tax incentives are in place to entice me into purchasing a commercial unit.
The fourth reason was probably the major item that helped me with my decision. For the type of power output that I was desiring the average cost for a commercially manufactured was between $6,000-8,000. I knew that for under $1,500 I could purchase all the items and build my own. Had there been federal/state tax credits that would have helped offset the initial investment, I would have gone that route.
The tower is another matter - I will not be building my own and am currently searching for a suitably strong - hopefully guy less free-standing tower, either monopole or lattice design. What money I save in the wind turbine will help offset the tower costs.
Disclaimer..
I am not a structural nor design engineer, the methods, tools, diagrams used/shown/discussed within this website are what I used building my own wind turbine, and as such warranty nothing. Use your own common sense when building yours and if in doubt see a professional.
It's Flying - Some Pictures..
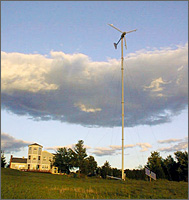
After all of my hard work the wind turbine is on top of the tower and operational.
Click on a picture to see larger image:


Guide on Residential Wind Turbine

Wind turbine tower with guy wiresGuide on Residential Wind Turbine

June 28th, 2010 — 11:24am
Residential wind turbines are a wonderful model to produce a
cheaper source of free energy. Knowing what to search for and where to buy one is essential in getting you started. If you are looking for a suitable residential wind turbine kit, the good news is that there is lots of places where you can do so. This is not something you can just get at a ironware store. Instead, a little searching have to be done first. In fact, the internet is one of the best places to find and buy residential wind turbines kits.
Assuming you have decided to purchase it online, there are a few points to check if it is a good bargain. You want to be positive you only purchase them online from a site that extends free transport though. Do not purchase them offline if the company does not provide free shipping. If not, the kit will be extremely costly with accumulated charges tallied on. On The Average, a rational price for a residential wind turbine should be around $300. If you find any sales where the cost deviates quite a bit you may want be be skeptical. It may be a scam.
A wind turbine is more commonly referred to as a windmill. It can also be referred to as a wind generator. Though the terms are used interchangeably, each is not the same as the other. What makes a wind turbine different from a windmill? For instance, a wind turbine converts wind energy into mechanical energy that can be further converted to electrical energy whereas a windmill will just use the mechanical energy as is. As a windmill does not convert the energy, it cannot really be considered a wind turbine even though the words are often used interchangeably.
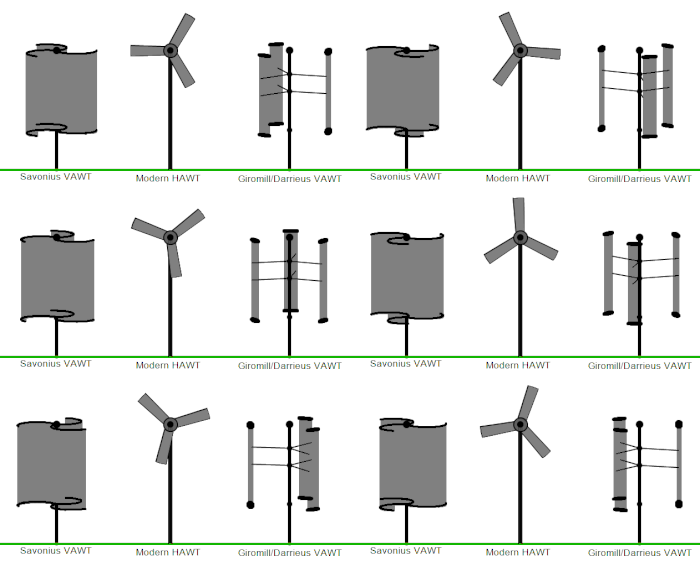
Let’s examine the different types of wind turbines. Wind turbines are classified based on their orientation. There are two basic kinds of wind turbines known as the Horizontal Axis Turbine and Vertical Axis Turbines. The Horizontal Axis turbine contains blades that rotate across a horizontal axis. Conversely, The Vertical Axis turbine rotates its blade on a vertical axis. The Horizontal Axis Wind Turbines are more popularly used in various parts of the world. This is because horizontal axis wind turbines are more efficient than the vertical ones.
The advantages of installing a residential wind turbine includes saving power, cost effective, environmental friendly and perpetual power supply.
Some advantages of wind turbines include:
  • Perpetual power supply – You do not have to be dependant solely on the government for your power supply. Endless supply of power means never having to deal with a power outage too!
  • Saving Power- Wind turbines use wind energy to produce the same energy that we have to pay electric companies to use so we save power by not having to use regular electricity.
  • Cost Effective – Because wind is free, the only actual costs a user incurs is in installing and maintaining the wind turbine.
  • Environment Friendly – Wind turbines run on a natural energy source and are therefore not harmful to the environment.
The benefits of a wind turbine so attractive that everyone would want to install one, but if it is not correctly done, it can be quite bad. Before installing a wind turbine, do consider the following.
  • You must have at least an acre set aside to install it on.
  • Make sure the average wind speed is about 11 miles per hour.
  • Make sure the tower and base are ironclad. It is the wind turbulence that can mess up your wind turbine so take that into consideration as well.
  • Make sure that the distance between the wind turbine’s height and the wind generator and cells is optimal.

Tuesday, 2 August 2011

Vertical-axis wind turbines

Vertical-axis wind turbines (or VAWTs) have the main rotor shaft arranged vertically. Key advantages of this arrangement are that the turbine does not need to be pointed into the wind to be effective. This is an advantage on sites where the wind direction is highly variable, for example when integrated into buildings. The key disadvantages include the low rotational speed with the consequential higher torque and hence higher cost of the drive train, the inherently lower power coefficient, the 360 degree rotation of the aerofoil within the wind flow during each cycle and hence the highly dynamic loading on the blade, the pulsating torque generated by some rotor designs on the drive train, and the difficulty of modelling the wind flow accurately and hence the challenges of analysing and designing the rotor prior to fabricating a prototype.[citation needed]
With a vertical axis, the generator and gearbox can be placed near the ground, using a direct drive from the rotor assembly to the ground-based gearbox, hence improving accessibility for maintenance.
When a turbine is mounted on a rooftop, the building generally redirects wind over the roof and this can double the wind speed at the turbine. If the height of the rooftop mounted turbine tower is approximately 50% of the building height, this is near the optimum for maximum wind energy and minimum wind turbulence. It should be borne in mind that wind speeds within the built environment are generally much lower than at exposed rural sites.[citation needed]

[edit] Subtypes

Darrieus wind turbine of 30 m in the Magdalen Islands
Darrieus wind turbine 
"Eggbeater" turbines, or Darrieus turbines, were named after the French inventor, Georges Darrieus.[17] They have good efficiency, but produce large torque ripple and cyclical stress on the tower, which contributes to poor reliability. They also generally require some external power source, or an additional Savonius rotor to start turning, because the starting torque is very low. The torque ripple is reduced by using three or more blades which results in greater solidity of the rotor. Solidity is measured by blade area divided by the rotor area. Newer Darrieus type turbines are not held up by guy-wires but have an external superstructure connected to the top bearing.[citation needed]
Giromill
A subtype of Darrieus turbine with straight, as opposed to curved, blades. The cycloturbine variety has variable pitch to reduce the torque pulsation and is self-starting.[18] The advantages of variable pitch are: high starting torque; a wide, relatively flat torque curve; a lower blade speed ratio; a higher coefficient of performance; more efficient operation in turbulent winds; and a lower blade speed ratio which lowers blade bending stresses. Straight, V, or curved blades may be used.[citation needed]
Twisted Savonius
Savonius wind turbine 
These are drag-type devices with two (or more) scoops that are used in anemometers, Flettner vents (commonly seen on bus and van roofs), and in some high-reliability low-efficiency power turbines. They are always self-starting if there are at least three scoops.
Twisted Savonius 
Twisted Savonius is a modified savonius, with long helical scoops to give a smooth torque, this is mostly used as roof windturbine or on some boats (like the Hornblower Hybrid).

Modern wind turbines

Modern wind turbines
Turbine blade convoy passing through Edenfield in the UK
Turbines used in wind farms for commercial production of electric power are usually three-bladed and pointed into the wind by computer-controlled motors. These have high tip speeds of over 320 kilometres per hour (200 mph), high efficiency, and low torque ripple, which contribute to good reliability. The blades are usually colored light gray to blend in with the clouds and range in length from 20 to 40 metres (66 to 130 ft) or more. The tubular steel towers range from 60 to 90 metres (200 to 300 ft) tall. The blades rotate at 10-22 revolutions per minute. At 22 rotations per minute the tip speed exceeds 300 feet per second (91 m/s).[15][16] A gear box is commonly used for stepping up the speed of the generator, although designs may also use direct drive of an annular generator. Some models operate at constant speed, but more energy can be collected by variable-speed turbines which use a solid-state power converter to interface to the transmission system. All turbines are equipped with protective features to avoid damage at high wind speeds, by feathering the blades into the wind which ceases their rotation, supplemented by brakes

Resources

A quantitative measure of the wind energy available at any location is called the Wind Power Density (WPD) It is a calculation of the mean annual power available per square meter of swept area of a turbine, and is tabulated for different heights above ground. Calculation of wind power density includes the effect of wind velocity and air density. Color-coded maps are prepared for a particular area described, for example, as "Mean Annual Power Density at 50 Meters." In the United States, the results of the above calculation are included in an index developed by the U.S. National Renewable Energy Lab and referred to as "NREL CLASS." The larger the WPD calculation, the higher it is rated by class. Classes range from Class 1 (200 watts/square meter or less at 50 meters altitude) to Class 7 (800 to 2000 watts/square meter). Commercial wind farms generally are sited in Class 3 or higher areas, although isolated points in an otherwise Class 1 area may be practical to exploit.[12]

[edit] Types


The three primary types:VAWT Savonius, HAWT towered; VAWT Darrieus as they appear in operation.
Wind turbines can rotate about either a horizontal or a vertical axis, the former being both older and more common.[13]

[edit] Horizontal axis


Components of a horizontal axis wind turbine (gearbox, rotor shaft and brake assembly) being lifted into position
Horizontal-axis wind turbines (HAWT) have the main rotor shaft and electrical generator at the top of a tower, and must be pointed into the wind. Small turbines are pointed by a simple wind vane, while large turbines generally use a wind sensor coupled with a servo motor. Most have a gearbox, which turns the slow rotation of the blades into a quicker rotation that is more suitable to drive an electrical generator.[14]
Since a tower produces turbulence behind it, the turbine is usually positioned upwind of its supporting tower. Turbine blades are made stiff to prevent the blades from being pushed into the tower by high winds. Additionally, the blades are placed a considerable distance in front of the tower and are sometimes tilted forward into the wind a small amount.
Downwind machines have been built, despite the problem of turbulence (mast wake), because they don't need an additional mechanism for keeping them in line with the wind, and because in high winds the blades can be allowed to bend which reduces their swept area and thus their wind resistance. Since cyclical (that is repetitive) turbulence may lead to fatigue failures, most HAWTs are of upwind design.

wind turbines

This article discusses wind-powered electrical generators. See windmill for wind-powered machinery used to grind grain or pump water.
A wind turbine is a device that converts kinetic energy from the wind into mechanical energy. If the mechanical energy is used to produce electricity, the device may be called a wind generator or wind charger. If the mechanical energy is used to drive machinery, such as for grinding grain or pumping water, the device is called a windmill or wind pump. Developed for over a millennium, today's wind turbines are manufactured in a range of vertical and horizontal axis types. The smallest turbines are used for applications such as battery charging or auxiliary power on sailing boats; while large grid-connected arrays of turbines are becoming an increasingly large source of commercial electric power.

Monday, 4 July 2011

History of Wind Energy (Best)

Photo of a windmill that pumps water on the Great Plains.Since early recorded history, people have been harnessing the energy of the wind. Wind energy propelled boats along the Nile River as early as 5000 B.C. By 200 B.C., simple windmills in China were pumping water, while vertical-axis windmills with woven reed sails were grinding grain in Persia and the Middle East.

 
Early in the twentieth century,   windmills were commonly used  across the Great Plains to pump water and to generate electricity.

New ways of using the energy of the wind eventually spread around the world. By the 11th century, people in the Middle East were using windmills extensively for food production; returning merchants and crusaders carried this idea back to Europe. The Dutch refined the windmill and adapted it for draining lakes and marshes in the Rhine River Delta. When settlers took this technology to the New World in the late 19th century, they began using windmills to pump water for farms and ranches, and later, to generate electricity for homes and industry.

Industrialization, first in Europe and later in America, led to a gradual decline in the use of windmills. The steam engine replaced European water-pumping windmills. In the 1930s, the Rural Electrification Administration's programs brought inexpensive electric power to most rural areas in the United States.

However, industrialization also sparked the development of larger windmills to generate electricity. Commonly called wind turbines, these machines appeared in Denmark as early as 1890. In the 1940s the largest wind turbine of the time began operating on a Vermont hilltop known as Grandpa's Knob. This turbine, rated at 1.25 megawatts in winds of about 30 mph, fed electric power to the local utility network for several months during World War II.

The popularity of using the energy in the wind has always fluctuated with the price of fossil fuels. When fuel prices fell after World War II, interest in wind turbines waned. But when the price of oil skyrocketed in the 1970s, so did worldwide interest in wind turbine generators.

The wind turbine technology R&D that followed the oil embargoes of the 1970s refined old ideas and introduced new ways of converting wind energy into useful power. Many of these approaches have been demonstrated in "wind farms" or wind power plants — groups of turbines that feed electricity into the utility grid — in the United States and Europe.

Today, the lessons learned from more than a decade of operating wind power plants, along with continuing R&D, have made wind-generated electricity very close in cost to the power from conventional utility generation in some locations. Wind energy is the world's fastest-growing energy source and will power industry, businesses and homes with clean, renewable electricity for many years to come.


Build A Wind Turbine Click Here
Related Posts Plugin for WordPress, Blogger...