Showing posts with label Wind Turbine Build. Show all posts

Wednesday, 3 August 2011

Build a solar heater

Build a solar heater

By: Gary Reysa (www.builditsolar.com) © Gary Resa 2005
After walking into our new workshop one December morning and finding the inside temperature to be a bone-chilling 10°F (-12°C), I decided that it was time for a heating system! Given the rising costs of propane and our environmental concerns about using nonrenewable fossil fuels, a solar solution seemed fitting. I reviewed many solar collector concepts, and finally decided to install a thermosiphon air collector on the south wall of the building. The concept is elegant and simple. A thermosiphon design uses only the buoyancy of heated air to circulate air through the collector, eliminating the cost, maintenance, and energy consumption of fans, sensors, and controllers commonly used in other collector designs. On a sunny day, in a cold climate like ours here in Bozeman, Montana, this simple system can produce the heat equivalent of burning about 2 gallons (8 l) of propane. To minimize material use, I integrated the collector within the building’s structure. I also tried to make the collector easy to construct using readily available materials. In fact, making this collector should only take one trip to the hardware store and US$350. Set aside two or three days to complete the project.


Materials used to construct the thermosiphon collector can be found at most lumberyards and hardware stores.
How It Works

The thermosiphon collector consists of clear, corrugated poly carbonate panels fastened to vertical 2 by 6s. The clear panels, on the building’s south face, admit sunlight. An absorber—in this case, two layers of black metal window screen—suspended inside the collector captures the sun’s

heat energy. The air around the mesh expands and rises as it warms, creating a convection current. Vents located at the top and bottom of the collector allow air to circulate and become heated. Cool air enters the lower vent, is heated by the absorber, and rises through to the upper vents that exit into the building’s interior. This circulation of air continues as long as the sun shines on the collector. At night, as air in the collector cools to outside temperatures, airflow tries to reverse. Air in the collector sinks through the bottom vents and attempts to pull the warmed air from the building through the top vents. Use of flapper valves on the top vents helps prevent this reverse circulation and keeps the heat inside.
Nuts & Bolts

The collector is 20 feet wide by 8 feet high (6.1 x 2.4 m) for an overall area of 160 square feet (15 m2). The collector is 6 inches (15 cm) deep. In most cases, make the collector as large as your south wall allows (see sizing solar collector). The top vent and bottom vent areas should each be at least 50 percent of the collector’s horizontal cross-sectional area (again, more is better). The collector frame is constructed from wood, and consists of six vertical members, a bottom sill, and a top sill. The six vertical 2 by 6s divide the collector into five, 4-footwide (1.2 m) bays. A 2 by 6 is used for the bottom sill. A 2 by 8 is used for the top sill, which should be sloped at about 10 degrees to shed rain. The collector frame attaches to the building by lag bolts from the inside. The collector is glazed with clear Suntuf corrugated polycarbonate panels. These panels have an ultraviolet light-resistant coating on their sun-facing side to extend their life. Each panel is 26 inches (66 cm) wide by 96 inches (244 cm) high. There are ten panels. Pairs of 26-inch-wide panels are joined over a 1- by 1-inch (2.5 x 2.5 cm) vertical wood strip to make the 4-foot-wide panels for each bay. Two, 1- by 1-inch horizontal members provide additional support for the glazing. The absorber is installed on battens placed about halfway between the glazing and siding. After measuring the thermal performance with one, two, and three layers of window screening, I found that two layers work best.

Next

Disclaimer: Please use caution when working with tools such as saws, hammers, electric drills, etc.... Just because we feature these alternative energy how-to's does not directly imply that you will be able to do everything with any incident just by following the directions. Please make safety your number one concern! EnergyRefuge.com assumes no liabilities for accidents involving our instructions or those that are re-posted. Please use common sense and please consult a professional if needed.

Solar DIY/How-Tos


Everybody loves alternative energy how-to projects, so we are endeavoring to bring you the best alternative energy how-to's on the web. Check out our additions to the energy how-to section and leave some feedback for us in our forums. Our goal in providing this how-to section is to empower everyday individuals who seek to make change in their energy consumption and seek to move to alternative energy. We are here to share our experience in the alternative energy field, and hopefully it will inspire, encourage, and make a change in your energy use. Please contact us if you would like to submit a solar how-to or an alternative energy project.

Small Solar Electric Systems

Solar Energy ArticlesSmall Solar Electric Systems

Some of the alternatives for those looking to get cleaner electricity are small solar electric systems. Small photovoltaic (PV) systems can provide the ideal solution to locations where getting connected to the grid is impossible. They can be more efficient in sunny areas such as the American southwest, although they can work well in other types of climates, too.
PV small solar electric systems are designed to harness solar power as it hits the earth. These are crystalline silicon panels that capture sunlight and turn it into electricity, which is then stored in a battery bank. When battery charges drop below a certain level, the solar panels recharge the batteries. Photovoltaic panels can be mounted on a rooftop or a freestanding solar array rack.

Energy Savers recommends that before buying a small solar electric system the buyer should be sure that the site where it will be installed has enough solar energy to meet the electricity needs of the building, both efficiently and economically. The supplier can perform an analysis or give instructions on how to do that. It’s important to consider the geographic orientation and the tilt of the solar panels as these can affect performance. Still according to Energy Savers, it’s also important to accurately size the components of these small solar systems, especially when these are not connected to the grid (“stand alone”). The organization advises considering how much of the total electricity need the PV system would be expected to supply, which can be done by analyzing past electricity bills and consulting with a potential provider of small solar electric systems. Before installing small solar electrical systems, it is necessary to obtain permits from the city or county’s building department (a building or electrical permit, or both). The PV provider often looks after this for the client, but it’s important to make sure that permitting costs and responsibilities are addressed when negotiating an electricity system. Those who live in a homeowners association must also get approval from them, unless state laws say that citizens have the right to install a small solar system on the home. The fact is that the number of these types of systems is growing. Even a cold weather state like Minnesota has been registering record numbers of solar system installations (178 between January and November 2010), thanks to governmental incentives that have reduced costs per watt to $7.50.

Are You Ready to Build Your Own Wind Turbine?

Are You Ready to Build Your Own Wind Turbine?

build your own wind turbineHave you reached the point at which it would make sense to build your own wind turbine? If so, you’re definitely not alone!
We share a world in which the price of electricity is rising almost as quickly as the economic and job markets have crashed, leaving millions of homeowners desperate for ways to shave their monthly fuel bills. Switching to energy efficient appliances and light bulbs is a step in the right direction, but it’s only a baby step.
By deciding to build your own wind turbine, you’ll not only have a free and reliable energy source; you may even be able to sell the electricity you don’t use back to your electric company! You’ll also be protecting the environment and playing a small role in preventing climate change, because wind energy is clean energy. But what does it take to build your own wind turbine?
If the wind turbine you’re picturing stands a hundred feet tall with blades which would dwarf those on the propellers of the Titanic, relax. Not all home wind turbines are like the ones on utility company wind farms. They range in size from micro and pole-mounted models to those very tall stand-alone towers, and the sort of wind turbine you choose to build will depend largely on your location.
If your home is in an area surrounded by large buildings, the reality is that your local wind patterns probably won’t be regular enough for your wind turbine to generate more electricity than you’ll use in your own home. In that case, an inexpensive micro generator will be adequate. Using a micro wind turbine kit is the cheapest and easiest way to get the job done, but there are two caveats:
In an article, Discovery Channel News says that makers of some wind turbine kits might exaggerate the amount of electricity their products will produce in densely populated areas. Some of them, for instance, test their wind turbines on sea-level buildings in open areas when measuring the amount of watts of electricity they will produce at different wind speeds.
Some makers of wind turbine kits also claim their products will run silently and vibration-free. No wind turbine is either completely silent or completely still when the wind is blowing! So do your homework before choosing a micro wind turbine kit, and keep your expectations about the amounts of electricity you’ll be able to generate realistic.
wind turbinesBut what if you have enough open land that deciding to build your own wind turbine on a tower? According to The Owner's Guide to Energy Independence Alternative Power Sources for the Average American, most homeowners who have installed residential wind turbines have placed their generators on towers at least in height. Principles of physics dictate that speed at which air moves decreases as it is closer to the ground, with the greatest increase in speed occurring between ground level and sixty feet.
The wind turbine you build will have three blades resembling airplane propellers, which are connected to a magnetic generator, which in turn creates electricity. As the wind speed increases, the rotors to which your three blades are attached will turn more quickly, and the higher they are from the ground, the stronger the wind turning them will be so the more electricity they will make.
You can also, if you decide to build your own wind turbine, increase the amount of electricity generates by increasing the size of its blades. The design of the wind turbine you build should ensure that will automatically turn sideways in extremely high winds. This will allow the plane of the blades, which is normally perpendicular to the access of the turbine, to change and reduce the amount of wind load it experiences.
If you live in an exceptionally windy area, your home wind turbine should either be attached to a collection of batteries, or to your local power grid. Batteries will enable you to store the excess power you generate for days when there is little wind. Being connected to the power gird means you can sell it to your electrical utility.
Finally, while installing a micro or rooftop wind turbine may be something you can handle either by yourself or with the help of a few friends, erecting a 60-foot (or higher) tower weighing several tons will require the help of professionals.
Also, the Homeowner's Guide to Energy Independence suggests that you set aside 1% of the total cost of installing your home wind turbine for yearly maintenance expenses. Maintenance should include an annual inspection by the people who installed your wind turbine system, who will go over it from the ground up looking for possible problems!
If you really want to build your own wind turbine, and understand what’s involved, the opportunities have never been better!

How to build your own wind turbine - Aeolos Wind Turbine LLC

How to build your own wind turbine - Aeolos Wind Turbine LLC

With the development of renewable energy, more and more people are interested in DIY wind turbine. How to build your own wind turbine for home?   There were some articles about how to build a DIY wind turbine however most of them are not easy to do or the DIY wind turbine is very simple.
Aeolos wind turbine tell you how to build your own excellent wind turbine.  Firstly, you should know how many parts are in a small wind turbine?
Blades:
You can buy from your local hardware shop or the blade manufacturers.  There are several materials of blades: Glass fiber, Aluminum alloy  or alloy steel.  At present, glass fiber blade is the most popular for small wind turbines.
Generator:
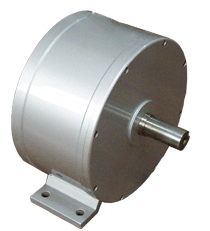
Generator is the heart of a wind turbine. An efficient and good quality generator is most important for a DIY wind turbine.  The following picture is the permanent magnetic generator of Aeolos wind turbine.
Turbine parts:
Other turbine parts included rotor, hub, bearing, gear, yaw and other parts. You can order these parts from the internet.
Control system:
The control system usually covered the control system and safety system.  An automatic brake system is necessary. It is better to set a mechanical hand brake.
Tower:
There are three types of wind turbine tower now (Guyed tower, Lattice tower, Monopole tower).  The height of tower and which type you should choose depended on you local site and  wind speed.
Some useful resources about how to build your own wind turbine.

How does my wind generator work?

How does my wind generator work?

Every wind generator, whether they produce enough energy to power a city or to power a small radio, works on these same basic principles...
    1. The wind blows
    2. The generator's vane (tail) causes it to turn into the wind
    3. Blades attached to an alternator/generator experience the force of lift and begin to spin
    4. The spinning creates electricity for us to use directly or to charge batteries

Sounds pretty simple eh? Well, then how the heck do I build one? Read on...

Tools Required

Surprisingly, building a simple wind generator only requires very basic hand tools, and if you are desperate you won't necessarily need all of them. I used...
  • Jigsaw (or a hacksaw and a lot of determination)
  • Drill
  • (2) Drill Bits (1/2", 7/32")
  • Tape Measure
  • Crescent Wrench
  • Pipe Wrench
  • Protractor (to measure angles for the hub)
  • Sandpaper (various grits)

Parts Required

I wanted to be as minimal as possible with my design (I'm poor), so I took the already simple designs from around the web and made them even simpler. All of the parts are available at any local home improvement or hardware store, and the entire setup can be constructed in as little as a weekend. Many of the parts you may already have lying around, and lots of substitutions can be made (instead of 1" steel pipe for the tower, you could use an antenna pole for instance). Here are the parts I used to build my generator...
  • 10" x 14" Steel Sheet
  • 10" x 1/4" Steel Nipple
  • 1-1/4" Floor Flange
  • 36" x 1" Square Tubing
  • 1/2" Bore Circular Sawblade (for hub)
  • 5/8" x 1/2" Arbor (to attach sawblade to motor shaft)
  • (2) Metal Straps
  • 8" x 4" PVC Pipe
  • 30" x 8" PVC Pipe (6" pipe works well too)
  • A DC Permanent Magnet Motor (preferably Ametek 30V or 260V 5A treadmill motor)
  • (8) 1/4" Bolts (with washers and nuts)
  • (2) 1/4" Sheet Metal Screws
  • 10-40 Amp Diode (the bigger the better)

All of the above parts (with the exception of the motor), can be picked up in a single stop to any large hardware or home improvement store. For the motor, the most popular types are old tape drive motors manufactured by a company called Ametek. The key is to finding a motor that puts out the highest voltage per RPM. For instance, the Ametek I'm using is rated for 30V at 325 RPM, making it excellent as an electricity generator (for a nice output comparison of the Ametek motors commonly found on eBay and other sites see TLG Windpower). However, pretty much any permanent magnet motor with a good volt/RPM ratio will do. Keep in mind that if you want to generate useful electricity, you will need to produce at least 12V to charge deep cycle batteries or run an inverter. My setup can easily achieve 300-400 RPM in a pretty average wind (for Oklahoma). These instructions assume an Ametek motor with a 5/8" shaft, but can easily be adapted to other motors (search ebay for "wind generator" and you will get a listing of lots of good motors).

Blade Construction

Arguably, the most important part of a wind generator are its blades. A lot of people like to carve their own blades out of wood or composite materials. However, for the rest of us, it's quite easy to make a good set of generator blades from common PVC pipe (and the efficiency isn't too bad either). A 2-3 foot section of either 6" or 8" PVC pipe will do the trick. Before we go any further, here are a few blade theory quickies...
  • The longer your blades are the more "swept area" you have to gather energy from and easier your blades will spin in low winds, but the slower your rotation speed will be
  • The tips of the blades always spin faster than the base, therefore one needs to take into account the "tip speed ratio" (TSR) when designing blades (there is a reason why old farm windmills will spin all year long at 40RPM)
  • The power that can be extracted from the wind increases by the cube of wind speed (something like P=k*v^3 k=constant of wind generator, v=wind velocity)
  • According to the Betz Limit, only about 59.3% of power can be extracted from the wind (so in reality P=.593*k*v^3, assuming k accounts for mechanical inefficiencies in the generator motor)
  • The higher you get the generator off of the ground, the more wind it will be exposed to (the general recommendation seems to be 25-50ft., but I've had decent results at just 12ft.)

Cutting the blades for this machine is very simple. You will need to cut your PVC pipe into 3 sections, two 150 degree sections and one 60 degree section (I've attempted to illustrate this VERY APPROXIMATELY in my favorite CAD program--and by CAD program I really mean MS Paint). The red lines are cut marks. You will want to use a good tape measure and possibly some construction paper or newspaper to mark everything before you cut. The 150 degree angles will result in wide blades that start up in lower wind speeds, however this will lower the shaft turning speeds. In practice, you will find that the optimum angle could be anywhere from 75-150 degrees. The best idea is start out with a wide set of blades that you can always thin out later if you need to. Remember, measure twice and cut once!
pvc blades pvc blades
After the blades are cut, I like to go ahead and smooth out all of the edges. If you want to follow aerodynamic theory, you can round the angled (leading) edge and flatten the straight (trailing) edge, but in practice I haven't seen this make much difference with PVC blades. So, you should end up with something roughly like these...

pvc blades

Hub & Blade Assembly

The next obstacle is building a hub to attach the blades to. There are many types of ways that this can be done. I have used circular sawblades and scrap steel disks. I recommend the sawblade approach, as they are readily available and easy to drill through. You can pick up an arbor with a 5/8" or 1/2" shaft at any homestore that will attach directly to the sawblade. Using the 1/4" drill bit, you will want to drill 3 sets of 2 holes 1" apart which each set 120 degrees from the next (this is where the protractor comes in handy, unless of course you are a Euclidean purist in which case you probably don't need a protractor). Here is a picture to make it more clear...
hub drawingIt's a pretty simple idea, but circular sawblades have worked out very well for me as hubs. Be sure and get some sort of rubber covering for the tooth edges and/or file down the edges as best you can, because the last thing you want is a hub of death flying at you if your generator decides to rip apart!
After our holes are cut out and we are confident of our safety procedures, we attach the blades to the hub (note that the hub pictured was cut from scrap steel, more pictures to come later)...
hub with blades


Tail & Pivot Assembly

Now we need to build a spinning platform for our generator motor to rest on. To achieve this, we will use some square tubing, a pipe nipple, flange, and small sheet of steel. Here is my "CAD" draft of what I wanted my tail & pivot assembly to look like, and a real picture of some of the parts I used...
wind generator drawing
wind generator materials


First, I recommend cutting the sheet steel with a jigsaw into a nice design for the the tail (Note: this step is quite unneccessary and ONLY for aesthethic reasons).

wind generator tail material


We then want to make a cut down the center of the square tubing. The length of the cut isn't that important, but I recommend about a 9" cut (this will help make balancing easier later on). We may then slide the tail metal into the hole and use the 1/4" drill bit to drill and attach the tail to the square tubing.

wind generator tail assembly


We will then want to cut out a weather covering for our motor. A piece of 4" PVC slips perfectly over the Ametek 30V motor that I use. I cut it out like so (note the side hole for the motor wires).

wind generator weather covering


Then we go ahead and paint it all up to seal everything from the elements. I wouldn't recommend painting on your front porch like I did though...

wind generator painting


After everything is painted, we can now put it all together. Take the floor flange and put it under the square tubing about 6"-7" from the head. Mark the holes and drill them out with the 7/32" drill bit (or any bit close to but smaller than 1/4"). Attach with the 1/4" sheet metal screws. Use the metal straps to secure the motor and cover assembly, screw on the pipe nipple and you should have something like this...

wind generator assembly


Tower Assembly

Every wind generator needs a tower. I built mine from some pipe fittings from my local hardware store. If you already have an antenna pole or electrical conduit lying around, then you can skip this section. Here is my recommended parts list for a small extensible tower...
  • (2) 5' Sections 1" Pipe
  • (1) 1" Pipe Coupling
  • (3) 1" Pipe Elbows
  • (4) 18" Pipe Sections
  • (2) 12" Pipe Sections

The tower base is pretty self-explanatory. Just hook up the elbows and pipe sections to create a base similar to this...

wind generator tower


From there we can attach the 2 5' sections of pipe together to form a nice strong mini-tower for our generator to sit atop...

wind generator on tower

Finished Product

Now we are ready to attach the blades to the motor shaft with the arbor. You will also want to go ahead and attach some wire to the motor and run it to a device to power or a bank of batteries etc...

fully assembled wind generator


Here is a picture of the experimental design using six blades. It would spin in practically no wind, but would never get past 100RPM. At least it looked interesting!
six blade wind generator


Here is the battery bank I'm feeding into in parallel with solar panels. I am just using two 12V marine deep cycle batteries that can be found at any place that sells car batteries. I keep them in a standard plastic tub with a hole cut in the sides for 12V fans I cannibalized from a couple of old Mac G4s (not pictured). Be sure and put a diode between the battery and the generator so that current doesn't flow from the battery to the motor.

wind generator battery bank


It turns out, cutting the blades a little thinner works better for my area. So I used the large white blades from the previous picture and thinned them out a bit. This resulted in the fastest shaft speeds as seen in first video at the top of this page.

homemade wind generator

Thank You

Wind Turbine Tower Trends

Wind Turbine Tower Trends

by Paul Gipe
An edited version of this article appeared in WindStats Vol 8 No 1, (1st Quarter 1995) Portions of this article were adapted from Wind Energy Comes of Age Copyright 1995 by John Wiley & Sons. All rights reserved. "Jay Carter was right. There's wind up there," said one wag about the industry-wide trend toward tall towers. Jay Carter Jr. was the first to install medium sized wind turbines on towers taller than 30 meters. His 160-foot (49-meter) towers are a prominent, if jarring, feature of the landscape in California's San Gorgonio Pass where they look down upon a seething mass of 1000 turbines atop once commonplace 24 meter towers. But the shift is most apparent in Denmark (see accompanying table) and in Germany.
Winkra's revealing market survey shows all major European manufacturers offer 40 meter towers at a minimum. The German wind company's annual price list of products on the German market now shows that Bonus, Carter, Nordex, Nordtank, Nedwind, Tacke, Vestas, WindWorld, and WindMaster offer towers up to 50 meters in height. The fierce competition in the German market has led some manufacturers to stretch their tower designs slightly to gain an edge. Vestas offers a 53 meter tower, for example, while Enercon, long the height leader, advertises the availability of a 65 meter tower.
 Tower Height
 Zond's Finn Hansen says 60 meter towers may make sense in the interior of Germany or in forested belts of Northern Europe but he hasn't seen a need for them in North America yet. Still, much of the sales sizzle in the National Renewable Energy Laboratory's advanced wind turbine program is based on the promise tall towers offer. NREL, a U.S. government laboratory, attributes nearly half of the expected 50% improvement in wind turbine production from their research program to towers twice the height of those common in the late 1980s.
 NREL's advanced wind turbine program assumes that hub heights increase from 90 feet (27 meters), considered the base case, to 180 feet (55 meters) with only a 10% cost penalty. The tall tower is justified if there's a high wind shear, such as NREL believes exists on the American Great Plains. With wind shear approximating the 1/7 power law, doubling tower height will increase the power available in the wind 45%. NREL's research, says Sue Hock, has found wind shear greater than the 1/7 power law.
 Minnesota, currently a hotbed of wind activity, will be the first region on the Great Plains to test the merits of tall towers in North America. Minnesota's Department of Public Service is seeking funding for a series of tall anemometry towers to measure the wind shear up to 60 meters above ground level at several sites in the state specifically to evaluate the production benefits of taller towers.
There are less benefits from tall towers in Britain, suggests Andrew Garrad, where there's stronger winds at 40 meters than on the American Great Plains. In some cases, such as National Windpower's Bryn Titli site in Wales, there's planning pressure for shorter towers to reduce the obtrusiveness of the turbines. The Bonus 500 kW turbines at Bryn Titli were installed on 35 meter towers rather than the 40 meter towers that have become the norm.
 NREL's Hock says that turbines and towers need to be tailored to individual sites, and tower height is part of the equation in North America as well. Bob Lynette agrees. The choice of towers, he says, is site dependent. Lynette is testing a prototype of his Advanced Wind Turbine on a 140-foot (43-meter) guyed tubular tower on Tehachapi's Cameron Ridge. Lynette's AWT-26, a redesign of the ESI-80 undertaken as part of NREL's advanced wind turbine program (from which its name was derived), lends itself to tall towers, says Lynette. Guyed pole towers are an economical means for reaching the heights NREL envisions.
 Zond offers a 40 meter tower as standard with its new Z-40 turbine and provides a 50 meter tower as an option. Hansen notes that towers of other heights could be used in response to specific site conditions. Trees or other obstructions and terrain could dictate taller towers. The choice, Hansen says, rests with the customer.
 Tower height is not simply a question of better performance, says the Oregon Department of Energy's Don Bain. No question that "tall towers can make or break some installations," he says. But Bain wants to know how tall towers effect the cost of energy. He argues that "least cost optimization" could favor tall towers in low wind areas and shorter towers in high wind areas as suggested by Andrew Garrad in Britain. The optimum depends on tower configuration and its cost. Bain also notes that aesthetics will be an issue in some places. Tall towers are more visible than short towers. And though tubular towers are visible for great distances on the North American plains, Minnesotans prefer tubular towers for aesthetic reasons.
 Aerodynamicist Woody Stoddard, also observes that tall towers are "a damn good idea--if you have an elevator." Lifts would make it easier for able-bodied technicians to quickly service the nacelle. Lifts would also enable the handicapped to service the machines says Stoddard. Zond's Hansen doubts today's turbines can economically justify elevators, especially in California where Hansen finds Cal-OSHA's safety regulations too costly. But the question could be re-examined, he says, as turbines grow to nearly one megawatt in size.
Another limitation to tower height is regulations requiring distinctive marking of structures considered navigational hazards for aircraft. Marking has no effect on performance but does magnify the intrusiveness of wind turbines on the landscape.
 Obstruction Marking
 The intent of obstruction marking is to make structures such as wind turbines more visible to aircraft. The flashing lights and red and white bands commonly seen on radio masts increase the contrast between the mast and its surroundings. Unfortunately this would also heighten the contrast between wind turbines and the sky, making them more visible not only to aircraft but to the public as well. Imagine the outcry from the Country Guardians if every wind turbine in Britain sported a flashing strobe light or from a Dutch landscape protection society if every wind turbine in the Netherlands were painted in such garish colors as the NedWinds off Medemblik.
Every country has such a requirement, though the actual limit varies. In the United States the Federal Aviation Administration regulations state that any objects exceeding an overall height of 200 feet (61 meters) above ground level "should normally be marked and/or lighted." In Germany the "Luftverkehrsgesetz" requires obstruction marking of structures more than 100 meters (328 feet) above ground level.
German manufacturer Enercon offers 40, 50, and 65 meter towers for their E-40 model. The maximum height of the E-40 on a 65 meter tower is 85 meters (tower height plus rotor radius), well below the German obstruction limit. Local authorities could still require navigation lights if the turbine was installed near an airport or a prominent flight path. The same limitation applies in the United States for towers below 200 feet. If the turbine and tower are deemed a navigational hazard, marking is required.
 Enercon is moving toward a standard 50 meter tower height for the North American market. The resulting 70-meter height to the tip of the blade on their E-40 will put them well above the 200-foot limit in the United States. Like others who've examined the issue, Enercon's Mark Haller expects that it will be sufficient to light perimeters turbines of a multi-turbine array in the United States, or it may be adequate to only mark corner turbines. Though neither approach has been tested.
 According to Subpart 20 of the FAA regulations "an FAA aeronautical study may reveal that the absence of marking and/or lighting will not impair aviation safety." On paper at least towers can exceed 200 feet in the United States without the need for lighting or painting if they pose no hazard to aircraft. If WindStat's call to the FAA western regional office in Los Angeles was any indication of what it will be like dealing with the federal bureaucracy in the United States, wind companies are in for tough sailing. "I just don't have time to discuss it," said the FAA's Bud Whitfield.
 The only documented test of the FAA's response since Boeing's MOD-2 fiasco near Goldendale, Washington, which did require lights and painting, has been in New York state. There AWS Scientific filed notices with the FAA for Kenetech's demonstration project with Niagara Mohawk Power Co. in Denmark township. A turbine with a 130-foot tower was accepted, but lights were required on a hypothetical 33-meter turbine and 160-foot tower reaching a total height of 213 feet. Partly as result of that experience AWS's Bruce Bailey recommends towers at least 120-foot tall in New York state and believes towers up to 140 feet tall will be acceptable. But he suggests shying away from overall heights exceeding 200 feet because of FAA lighting requirements. Bailey also notes that exemptions are possible, but warns that exemptions may be difficult to obtain from an obstinate bureaucracy.
 It was the FAA's 200-foot limit that dictated the height of Carter's original tall tower says NREL's Paul Migliore. Though he wanted to go even higher, Carter specifically chose the 160-foot tower height to avoid dealing with the FAA. Carter's 160-foot tower and his 23-meter turbine put him at just below the limit at 198 feet.
Migliore notes that the issue of navigational lighting has been avoided until now because no one wants to spend the time fighting the FAA unless they need a permit for a specific project. "It's just a matter of time," says Earl Davis of the Electric Power Research Institute, before this issue is raised. Like Carter earlier, the tower height of EPRI's 6 MW demonstration of Zond's new Z40 turbine in Texas was limited to 40 meters (130 feet) even though Zond has long experience using 140-foot towers. Zond's Hansen notes that he has installed lights on turbines in Sweden and Germany. But both sites were near airports where the precaution was warranted.
 "The jury's still out," says Dan Juhl on the requirement for lights in the United States. "It depends on where you are." Juhl feels regulators in Midwestern states will be more accommodating than those in more densely populated regions of the country such as New York and California. After all wind turbines pose far less of a navigational hazard atop Minnesota's isolated Buffalo Ridge than they do in Israel's Golan Heights where ground-hugging flights by Israeli fighter bombers required Britain's Markham to candy-stripe their turbines. Nevertheless, Juhl says he doesn't believe there will be significant advantages from towers over 50 meters tall in the Midwest. The biggest limitation, he says, will be the large cranes necessary to install tall towers.
 Lattice versus Tubular
 In another contrast with the United States, Europeans have almost universally embraced tubular towers. While the trend toward taller towers in Britain is mixed, it has become clear that there's a planning presumption against lattice towers, because of their appearance says Andrew Garrad of Garrad Hassan partners.
There's also a clear preference for tubular towers among landowners in Minnesota, says John Dunlop, the American Wind Energy Association's Great Plain representative. Technicians familiar with the upper Midwest's frigid winters also favor tubular towers for the protection the towers provide from the wind.
 Skip DeLong of Southwestern Technical College in Jackson, Minnesota, says he "definitely prefers tubular towers" for maintenance in cold climates such as that of the upper Midwest. Like Stoddard, DeLong argues that wind turbines need to be "maintenance friendly and the tower is certainly a part of that" equation. DeLong worries that it may be difficult to do any service work on lattice towers in sub-zero (Fahrenheit) weather.
 "We always recommend tubular towers" even in the United States, says Vestas American's Oscar Holst Jensen. They do, says Jensen, for safety in cold climates, for better security (tubular towers have a lockable door), and for aesthetics. "They (the turbines) look much better on tubular towers," says Jensen. "But," he adds, "we give the customer the choice." Mirroring Southwestern Technical College's DeLong, Jensen argues that turbines on lattice towers will have lower availability in the Midwest than those on tubular towers. "It's a tricky business to climb a lattice tower in the winter in Minnesota."
 But the profit margins are so small in the North American market, says Jensen, that there's a lot of pressure to use lattice towers. For example, nearly all of Zond and Kenetech's turbines in California use lattice towers. Between them they produce a third of California's total wind generation. In Europe the planning pressure for tubular towers is so great that it's nearly impossible to use lattice towers except in Spain, and even there the trend is toward tubular towers.
 According to Vestas' Jensen, a tubular tower for a 500 kW V39 costs about $25,000 more than that for a lattice tower in the United States. The difference is only 4-5% of installed equipment costs. This compares well with the experience of Zond's Hansen. The truss tower and its foundation for Zond's first prototype of its Z-40 accounts for 15% of installed costs. The tubular tower and foundation for Zond's second prototype, says Zond's Hansen, accounts for 20-25% of installed cost.
 But lattice towers are more costly and difficult to assemble than tubular towers Jensen continues. Lattice towers require torquing 400-500 bolts, a small crane, and a lay-down yard or staging area for assembly. Complex terrain can complicate if not thwart use of lattice towers because of the need to transport lattice tower sections from the assembly yard to the final site. The transport of huge assembled lattice tower sections is a hair-raising experience and risky task.
 Kenetech, the sole U.S. turbine manufacturer with machines in the field, offers towers in two heights: 80 (25 meters) and 120 feet (37 meters). Like Zond Systems, Kenetech clearly prefers lattice towers because they are initially cheaper. But they will bow to local preferences and use tubular towers for their projects in Britain and the Netherlands as they did for Northern States Power in Minnesota. Kenetech is widely credited with successfully developing an aesthetically pleasing tubular tower for NSP's 25 MW project on Buffalo Ridge.
Kenetech will also use tubular towers to meet demands from wildlife agencies some of whom believe that lattice towers contribute to killing birds in the Altamont Pass. Kenetech's tubular towers were hardly in the ground in Minnesota when Kenetech announced that they planned to replace their lattice towers with their ungainly "Kenetower." The only advantage the Kenetower offers to traditional tubular towers, such as that used on the NSP project, is less costly foundations. By spreading the tower's legs over a wider footprint than that of a conventional tubular tower, the Kenetower requires less excavation and less concrete for its footings. But the resulting appearance of the tower may be too high a price to pay for lower-cost footings. Referring to the Kenetower's rocket-like shape, one wind pioneer caustically says it "would probably make it to the moon." He also notes that the open base of the tower provides only limited shelter to windsmiths during the winter.
 Crane Size
 "There are logistics problems" with bigger machines says Bob Lynette. The bigger turbines, those in the 400-600 kW range, are more difficult to transport and install, he says. Turbines have become so big that installation on 40 meter towers in California requires 160-ton, rigid-boom cranes. These cranes are costly and difficult to maneuver in rough terrain. A crane operator was electrocuted in the Tehachapi Pass when the boom on his crane inadvertently swung into power lines while he was driving on a winding wind farm road. These large cranes could become a limiting factor on turbine size and tower height.
The lightweight nacelle of AWT-26 lends itself to tall towers, says Advanced Wind Turbine's Bob Lynette. The AWT-26 only needs a 100-ton crane. "There's a place for smaller machines," says Lynette in reference to the AWT's 26 meter rotor, especially in Third World countries without large cranes.
Lynette offers towers up to 140 feet and a choice between a conventional lattice tower and a guyed tubular tower. There's a negligible difference in cost between the two tower types, says Lynette. But the tower alone of a "walk up" tubular tower like those used by other manufacturers, costs twice as much as AWT's guyed tower with its external ladder.
 The greater footprint of guyed tubular towers relative to conventional tubular and lattice towers may make them less desirable to farmers and ranchers who will have to dodge them with their tractors. The problem is not unlike that faced a decade ago by Carter with his slender guyed tower. Landowners may demand higher royalties to compensate for their trouble. It's conceivable that higher land leases for guyed tubular towers could offset their lower initial costs, boosting long-term operating costs.
This and other questions about optimum tower design and height await conclusive answers. In the meantime everyone agrees that Jay Carter Jr. was right, but how right remains to be seen.

How I Built a Wind Generator

How I Built a Wind Generator in My Backyard for $150

Lately I've been spending a great deal of time working on ways to generate my own electricity. It isn't a necessity for me yet, but someday being electrically self-sufficient could really come in handy. My interest started a while back when I stumbled upon a how-to article on building wind generators from treadmill motors and PVC pipe. It sounded easy enough, so I decided to try and design my own. This particular design can be built for $100-$150 if you are thrifty and can regularly generate 50-250 watts (considerably cheaper than a solar panel of similar power output). Here's how I built it for those of you who are interested. Additionally, please check out my new frequently asked questions page for more information not discussed in detail here.


Videos

Wind Turbines Vs. Solar Panels

Wind Turbines Vs. Solar Panels

June 28th, 2010 — 11:21am
What will work better: residential solar panels or wind turbines for the residence? A great deal will be based upon the region where you live as well as the weather conditions
there. Here we will check out the pros and cons of both starting off with the benefits of solar panels.
Solar panel pros:
1) Although commercial solar electricity systems are even now relatively expensive, the expenses are coming down. Best of all, your can assemble photo voltaic panels pretty easily and for roughly around $100 each. The actual construction of a photo voltaic panel is really really simple. You possibly have all or most of the tools you’ll have to have in your garage.
2) Solar panels are very easily added as time goes by. If you start with a smaller array, even one or two panels, you’ll be able to add to it as your time and money permit. Do not think as though you need to install an entire solar system to your property all at once. Get started now and at some point you’ll have a solar powered house. With every single panel you put up, you’ll have to buy less electricity from the utility company.
Solar panel cons:
1) Photo voltaic panels do not function at night. This isn’t a real disadvantage if you are still connected to the electrical grid. You’ll be able to buy electrical power at night and sell electricity you produce back to the power company in the day time. This ebb and flow of electrical power translates into no electric bill to pay each month.
2) Climate can be a limiting factor. Residential solar energy will work far better in Phoenix than it will in Seattle, but the fact is there’s adequate sunshine in almost every city and state inside the United States to make your own solar energy feasible.
Wind turbine pros:
1) Like solar, after your wind turbine for your residence is installed and operating, the maintenance is minimal. You can even construct your own wind turbine for under $150. Commercial wind turbines would cost a lot more, but if you know how simple they are to assemble there’s no reason to buy commercially.
2) Wind turbines for homes generate power day and night, whenever the wind is blowing. Like solar, some locations are going to be much better than others but wind power generators are absolutely realistic in most areas of the country.
Wind turbine cons:

1) A rooftop wind turbine could be a bird hazard. On occasion birds fly into the blades of rooftop wind turbines and are injured or killed. The hazard is really no more than the smaller windmills you see for irrigation on farms. The bird hazard is actually significantly more a concern with large wind farms situated in major bird migration routes like the ones in Southern California.
2) Wind turbine generators make noise. Unlike a residential solar panel which is 100 % silent, a residential wind generator will make a whoosh whoosh sound as it spins.
Whichever you decide on, photo voltaic or wind power, you’ll be a winner and so will the environment. You will have lower or no electric bills and there will be less carbon dioxide spewed into the atmosphere. And here’s a thought for your future: Nissan now sells an all electric vehicle, the Leaf, and many more car manufacturers will have them in the foreseeable future. Imagine never having to pay for gasoline once you generate your own power at home.
Comment » | wind turbines

What to Know in Residential Wind Turbines

June 28th, 2010 — 11:19am
When you think about wind turbines, the tower with four blades reminiscent of Holland country landscape with the tulips and the Dutch gal is the first image that may come to mind. That image of a windmill seems a prototype of the mechanical wind turbine, also called aerogenerator that uses the wind energy to turn kinetic energy to electricity. It is also one of the mechanical inventions requiring great respect for it helps in alleviating the over-dependence of fossil fuels in generating electricity to power homes.
A distinction is to bring regards though in associating windmill with wind turbines. Windmill has mechanical purposes and that may not include generating electricity. The wind turbines, however, are invented to harness the strength of the wind to convert energy to electricity by turning the blades of the electric-generating wind system.
It may not be necessarily that huge to construct one unless you want megawatts of electricity to power a lot of machines in many households; that situation may need a behemoth one or numerous wind turbines beautifully lined up on a road or isolated locations to bring electricity to a whole town or a district of towns. The wind turbines may be humongous but seeing them collectively in an orderly, interval set-up makes them like the 8th modern wonders. These turbines have been utilized as a gradual replacement to the fossil fuels.
However, in the case of wind turbines for domestic application, the towering machines don’t have to be that big. A certain size for home use may be installed though. But, it is also important to note how much electricity you normally consume, as this will be a factor in availing a residential wind turbine with the appropriate capacity of the system for use in homes.
There are some things to learn about residential wind turbines. Although aerogenerator can be among the best machines that help lessen the amount of smokes fumed out from the power facility, using this at home is in simultaneous fashion with procuring electricity from local power utility at the beginning. The cut-in speed of wind turbines for homes is 7-10 mph. Below that speed is not sufficient to power a home, so it is better to have another connection of wires with electric power derived from the local power utility plant.
However, when the wind speed peaks up in the location of the wind system, enabling the turbine to roll its blades faster, the energy piles up converting to electrically charged current. As the turbine’s blades move at faster rotating speed and continuously, more and more electric current is made and the electricity may be enough to power homes, thus decreasing or eventually eliminating the dependence of power from the local power retailer. There can also be the tendency that the excess power produced from the turbine can be sold to the local power utility.
Residential wind turbine is an alternative medium to obtain energy to turn into electricity to power homes. This can be used as replacement to or in conjunction with solar panels, making your home environmentally friendly. This blade-turning machine with rotor and shaft may not even require batteries to make it work. Modern residential wind system eliminates the need for batteries and this is to watch out for when opting to acquire one or a set of required wind system.
If you desire to have a set of the wind machine system that helps generate electricity in your homes, make it a point to browse around. The best deals of residential wind turbines are just here for your purchasing decision.
This website has been created to chronicle the building of my 17' diameter wind turbine.
  
Background...
In the fall of 1999 I moved to a rural area of West Virginia, named Terra Alta (high earth). To be honest we live at the *top* of Terra Alta, our house is at an altitude of 3000' where we have a panoramic view of about 270 degrees for up to50 miles!
Besides the wonderful view we also have wind, lots of wind!
So why not harness some of this to generate our own electrical power?
Typically I research the heck out of stuff, and this project is no exception! There is one website that I have found to be *the most* informative site (OtherPower). I have decided to build a wind turbine that closely resembles their 17' diameter unit, the main changes that I will be making is some slight modifications to 'beef' up the metal structure in a couple of places, otherwise it will be the same. This turbine is of the axial flux design. I want to output 2-3kwh in a 20mph wind and have found that this one should suit my needs.
Post note: they have redesigned and rebuilt their 17' turbine and it now is capable of putting more power! The structure of it closely resembles their larger 20' wind turbine.
Some good informative reading "The Bottom Line About Wind Turbines", this is a good place to start out to help you determine if a wind turbine would suit your needs.
Commercial Possibilities...
There are more and more commercial business that are involved with 'green' power'. If you have any doubts in your abilities to make your own wind turbine then either seek out a workshop (the guys at OtherPower.com have them) or purchase a commercially available unit. Many wind turbines are now available that output anywhere between 400-3.5kwh, with price and size being the major differences.
Roll your own...
I made the choice to make my own wind turbine. There were a number of factors that influenced this decision: 1) I have the skill sets 2) I have the tools 3) I have the desire 4) No tax incentives are in place to entice me into purchasing a commercial unit.
The fourth reason was probably the major item that helped me with my decision. For the type of power output that I was desiring the average cost for a commercially manufactured was between $6,000-8,000. I knew that for under $1,500 I could purchase all the items and build my own. Had there been federal/state tax credits that would have helped offset the initial investment, I would have gone that route.
The tower is another matter - I will not be building my own and am currently searching for a suitably strong - hopefully guy less free-standing tower, either monopole or lattice design. What money I save in the wind turbine will help offset the tower costs.
Disclaimer..
I am not a structural nor design engineer, the methods, tools, diagrams used/shown/discussed within this website are what I used building my own wind turbine, and as such warranty nothing. Use your own common sense when building yours and if in doubt see a professional.
It's Flying - Some Pictures..
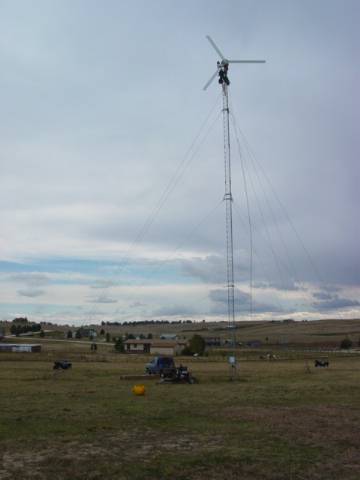
After all of my hard work the wind turbine is on top of the tower and operational.
Click on a picture to see larger image:


Solar Power Step By Step Guide

Solar Power

    --------

Solar power is the basis for all life on earth! Solar heating has been used for thousands of years to warm dwellings (solar thermal). But solar electricity (photovoltaics) is a very new industry.

arco

Solar Photovoltaic (PV) --a zero maintenance, zero fuel cost electric generator


Solar panels have no moving parts. You just mount them out in the sun, hook up the wires, and collect power, without adding fuel or replacing worn-out parts. It's amazing that nobody knows for sure how long a solar panel will last. That's because many of the very first photovoltaic panels are still producing power today.

Solar Electricity Basics

We often receive questions here along the lines of 'how many solar panels do I need to power my 3,000 square foot house?' We don't sell or install solar power systems, so we can't provide free consulting services and still keep our business running. However, we've written numerous articles on the topic and compiled a list of resources to help answer your questions and start you on the right track for doing your 'homework' on the topic:
  • The design, size and cost of a solar photovoltaic power system for your home depends on only a few simple factors:
    1. How much energy in kilowatt-hours (kwh) do you use per month, and how much does it cost you?
    2. What can you do to reduce your energy usage, and how much will that cost you? (Every dollar spent on conservation will save you $3-$5 on the cost of an RE power system).
    3. What solar resource do you have available at your location?
  • Renewable Energy Basics -- This article guides you through answering ALL those questions above, in great detail. Includes information on grid-tied, off-grid and grid tie with battery bank systems.
  • Designing a tiny solar power system for a camping trailer -- This article goes through the basics of designing a properly-sized solar power system, including calculating your inputs, loads and battery bank size.
  • If you are serious about moving to a solar power system for your home or cabin, most local solar dealers / installers will provide you with a free or low-cost estimate and energy estimate. Going local is an excellent choice!
  • Most internet solar power retailers have lots of free information online, including system sizing spreadsheets. Two retailers that we patronize frequently because of their great customer service are The Alternative Energy Store and Backwoods Solar -- but there are many more excellent retailers online.
  • Shopping by Dollars per Watt is the best way to choose solar panels. Photovoltaic panel prices have steadily been dropping at 3-5 percent per year for the last decade or so. However, prices may not seem all that low to you, because in general the technology is getting better, so each panel is making more watts than those of a few years ago. You have two options for buying photovoltaics, new and used:
    • New photovoltaic panels -- This page gives some details about new panels, including how the technology is advancing, and information about tracking mounts.
    • Used photovoltaic panels -- This page discusses how to inspect used panels for damage and test their output before purchasing.
    • We are no longer maintaining our used solar panel mailing list. Because of strong demand for large photovoltaic installations around the world, there has been a general shortage of new panels. This has increased demand for used panels too, and we have not seen any large lots of used panels available for 4 years now. The best places to look for used PV panels are your local newspaper classifieds, Craigslist, and Ebay.

Solar Thermal Panels -- using the suns energy directly for heat

Using solar power directly to heat air or water is the most efficient way to do it. Solar electric is not a very efficient way to heat things, but solar thermal works great! We don't have a huge amount of information here about solar thermal, but there are some links below for you.

  • Passive solar house design is an excellent way to heat a home. Generally it's designed into the home from the ground up, with south-facing windows, thermal mass to store heat, lots of insulation, and thermal blankets for the windows at night. DanF's home was designed this way. Until we do get a page up here about passive solar heating, you can search the internet for the term and get a wide variety of books and articles on the topic.
  • Solar hot water heating panels became very popular in the USA in the late 1970s and early 1980s for preheating a homes hot water. Government tax credits were offered by the Carter administration, and many companies sprang up designing and installing systems. When the Reagan administration cancelled the tax credits, many of these companies went out of business, and there were very few people left to maintain and repair these systems. Many of them are still sitting on roofs today, broken. HOWEVER, it became obvious very quickly that some of these companies were 'fly-by-night' and their products were poorly designed in the first place:
    • In general, we advise against purchasing these old systems used. It's actually easy to find one for free, which might be OK if you are experimentor and enthusiast. But these older systems used numerous active controls, sensors and pumps, and were very unreliable compared to the excellent, low-maintainance and reliable systems available today.
    • Solar water heating panels are NOT a new idea! This article about the history of solar water heating is an excellent read. Thousands of systems were installed and were very effective in sunny parts of the USA around 1900.
    • On the other hand, modern solar water heating panels are an excellent investment in most parts of the county! The technology has changed so much that these systems are now completely different in design than those from the Carter area that caused so many problems. Some industry analysts say that the loss of the tax credits, while it had a large negative impact on the industry at the time, ended up being the best thing that ever happened to the industry in the long run.
    • These systems are now often incorporated along with radiant floor heating pipes. The sun heats the fluid, which circulates inside the high thermal mass floor of the home. This is a VERY efficient way to heat a home!
  • Solar air heating panels are another new technology that's catching on quickly. It allows the homeowner to retrofit a house that was not orginally designed for efficient passive solar heating, and reap the benefits and energy savings of heating with the sun.

STORAGE BATTERIES

STORAGE BATTERIES

    --------
Battery Bank

"FEW BATTERIES DIE A NATURAL DEATH...MOST ARE MURDERED"

----Unknown Industry Representative (please take credit for this quote if you originated it!) Source: Sunelco Planning Guide

BATTERIES ARE YOUR MOST IMPORTANT COMPONENT

Your battery bank is THE MOST important part of your remote power system. If you have to cut corners to afford the system you need, skimp somewhere else. The rest of your system is only as good as the battery bank!

BATTERIES ARE ANTIQUE TECHNOLOGY

Well, OK, not quite! But the most common and cost-effective banks of large batteries for remote power storage are the flooded lead-acid type, and a battery reference book from 1910 will give you all the information you need about charging and maintenence. And like the antiques, modern batteries for remote power use are still heavy and cumbersome to move.

"DEEP-CYCLE" BATTERIES ARE NOT

Unfortunately, there's not a battery out there that thrives on abuse. "Deep-cycle" batteries are designed to resist damage from repeated deep discharges (50% to 80% of capacity used up)...but will still last significantly longer if discharged by only 20%.

Make Your Own Wind Turbine Step By Step Guide

Wind Turbine Towers

Some thoughts on Towers

hr.jpg


This page contains some thoughts and pictures about towers. The tower is perhaps one of the most important parts of a wind turbine. It can also be well over half the cost of a system overall. Guidelines suggest that a tower should be 30' above anything within a 300' radius in order to keep the turbine up in clean, non-turbulant wind. Air is very fluid (like water) - any obstruction to the wind creates turbulance (like the wake behind a boat). You cant see it, or detect it - but it's hard on a wind turbine and it costs lots of power. Oftain times the best time/money spent on a system is on a nice tall tower.
In practice, we cannot always follow guidelines, we have to work with available resources (time and money). In some places there are few obstructions on the ground, the ground is flat - and an effective tower might be easy. Where we're located (in the Rocky Mountains) we have fairly tall trees - lots of ridgetops.. rocks poking up, unlevel ground - not a lot of money etc, so folks up here take what they can get.

Pictured above is an 80' guyed lattice tower with a 10KW Bergey machine on its top. Scary climbing this sort of thing!
There are a couple common approaches to building towers. Free standing towers require significant foundations, they have no guy wires. They are either lattice towers, or made from pipe/tubing. Their main advantage I think is their appearance, and the very small footprint required. Most very large (utility scale) wind turbines are on free standing towers, they don't seem very commonly used in smaller system probably because of their cost. Guyed lattice towers are common. Usually they are erected with a jin pole or a crane - the same equipment would also be required to install the wind turbine. We have very little experience with these towers. Both types mentioned above require climbing. From here on, we'll discuss simple towers made from pipe that can be tipped up with a winch, or a truck.

Pictured above is a drawing of a simple 40' pipe tower. Of course many things could be changed, it could be scaled up or down - and there are other ways of doing things. It's typical of several that we've built though and is very workable for a 8 - 10' diameter wind turbine. It's made from Sched 40 steel pipe. Pipe comes in 21' sections, so the tower itself is made from two lengths of pipe. Pipe is measured by its inner diameter. The top section (2.5) dia slips down about 1 foot or so into the bottom section (3" dia). Most wind turbines we build now use 12" of 2.5" pipe for the yaw bearing, so at the top we need a stub of 2" pipe about 13" long for the wind turbine to slip onto.
The jin pole is also from 2.5" pipe, as a rule I like the jin pole to be at least 1/3 as long as the tower is high. The longer the jin pole, the easier it is to raise the tower. If its too short, the forces really add up, and it goes up and down too quickly. Longer is better. There is a gusset (2" pipe) in between the tower and the jin pole, it's length is not terribly important - it serves to reinforce the point at which the jin pole is welded to the pivot. 6-8' long would be fine for that gusset, though we've made them both shorter and longer. There also needs to be a heavy cable (3/8" thick) that runs from the tower top to the end of the jiin pole. This cable takes all the force when raising, or lowering the tower.
This tower has 2 sets of guy wires. The side guy wires should be inline with the pivot as they must support the tower while its being raised and lowered. The top set of guy wires should be attached as near the top of the tower as possible such that the blades of the wind turbine cannot hit it. So for a 10' machine, we'd have the top guy wires about 5' from the tower top. The top guy wires take almost all the force from the wind turbine, so they should be heavier than the bottom ones. 1/4" thick steel cable is OK for a 10' wind turbine. I've used lighter stuff, but I wouldn't suggest anybody else try it. The stronger it is.. the longer it will last. The second set of guy wires should be about where the two pipes join - about 22' from the bottom. They serve mostly to keep the tower rigid, they can be lighter stuff. I'd suggest 3/16" cable.


Pictured above is the bottom of my tower. Notice the pivot is made from a simple pipe over pipe arangement. Notice the window in the pipe where the power chord comes out. This allows the machine to pivot easily, and the length of the chord can wind up (or wind down) over time without being a problem. We have a locking plug here so that on occasion we can unplug the maching and allow the chord to unwind if need be. If the site is not turbulant - this is rarely required. With a new installation, it's probably wise to check this frequently to get an idea how oftain it needs attention. I check mine about every 3 months.. it's usually fine.

The drawing above shows some thoughts about how to build a pivot from pipe. The one pictured would be very strong - I've made much lighter duty ones that worked fine. It needs to support the weight of the tower - thats all. The foundation on which the tower/pivot sits is also not a big deal. Much more important are the guy wire anchors. A simple metal 'foot' that can be staked down will suffice for the tower, because all the force is straight down. Main thing is that it cannot slide easily, and that it doesn't sink into the ground. If it sinks it will cause the guy wires to loosen. So, a small concrete pad might be a nice tower foundation, but it's not required.
Also in the picture above is a drawing of the same tower in the 'down' position. You can see how the side guy wires must go up and down with it. Its nice if the guy wires dont loosen - or tighten when the tower goes up and down. In a perfect world, if the ground is perfectly flat and the guy wire anchors are at exactly the same elevation and inline perfectly with the pivot, that would be the case. Otherwise though, it's better if the guy wires tighten as you raise it and loosen a bit when you lower it. That will happen when the guy wire anchors are slightly in front of the pivot (by in front, I mean on the same side of the pivot that the tower tips towards, and opposite from the side where you'd have the winch/truck). It will also happen if the guy wire anchors are at lower elevation than the pivot.
Also shown in the bottom drawing are two 'guy wires' attached to the top of the gin pole. This prevents the jin pole from tipping over. We dont have this on all the towers we've put up, but it's nice insurance. They dont need to be real tight, I dont think turn buckles are required -and once the tower is raised, they can be removed so folks dont trip over them. They are nice to have in place while rasing and lowering though...
Again, like all things - we have to work with what we have. Up here its quite rocky, the ground is almost never level so we work around what we have. My tower has one guy wire much higher than the pivot, one is much lower. My pivot is fairly loose (it has slop to allow the tower to tip some to the side) and when going up or down, it's supported only be 1 of the side guy wires and it leans to the side. Not ideal - but workable. Its very important when raising a tower for the first time to go very slowly, pay close attention the guy wires. If both side guy wires seem to be tight - time to stop, lower the tower again, make adjustments. Once a guy wire gets tight you have no way of knowing how much force is on it, it's quite easy to break one, or tear it out of its anchor.

Whenever raising a tower, it's important to double and triple check *everything* before you start. Its important to make sure everyone is out of the 'fall zone'. There could always be surprises and its best to prepare for the worst with these things. Pictured above is Wards tower -first time we ever raised it. We double checked everything, only to find out afterwards that we'd forgot to hook up guy wires on the west side. We also didn't test raise it first, we were confident enough that we put the machine on it. The only thing we did correctly here... was to be sure that nobody (including dogs) was anywhere near the fall zone when we raised it .

Here is a picture of a guy wire anchor. This is a nice way to anchor into solid rock. We drill a hole (usually 6" deep), and epoxy re-bar into it. Not shown very well here, but - each guy wire is attached to a turn buckle, and inside the loop we have a 'thimble' - which keeps the turnbuckle from wearing into the steel cable. The guy wire is fastened with 3 cable clamps.

Here's a tilt up tower in a rather rocky location. Here, we were able to mount all the guy wires, the pivot, and the winch into solid granit.

This inexpensive worm gear winch works nicely for small towers. You can take off the handle and fit a 1/2" drill to it to speed things up. These imported winches cost $20 - $30. They work nicely, though it wouldn't hurt to have something a bit heavier for the tower described above in the drawings. The one in the picture above is welded to re-bar that's epoxied into the rock.

Pictured above is a tower almost exactly like the one in the drawings. Notice at the end we've welded 'feet' onto it that hold the end of it off the ground. Also notice the pivot - a simple 'H' shape made from pipe that sits on the ground. We staked this one down - it worked fine.

Here is another shot of the same tower that shows the 'foot' a bit better. It's very helpful to have this while working on the machine. Another option is to have a 'stand' on the ground that the tower lands on. Ideally, it should hold the tower up enough so that the blades of the wind turbine can never hit the ground.

Here is a nice pivot on a concrete foundation. This is under a 40' tower.

Concrete makes for a nice guy wire anchor. Here George built a nice form, and cast a re-bar loop into it to hook his turn buckles onto. Another possibility for guy wire anchors is a 'dead man'. Take a log (or something large and heavy) - wrap a chain around it, and bury it. If it's large enough it'll be fine.

At another very rocky site, we built the pivot for the tower between two rocks. It's supported on each side by several pieces of re-bar that are epoxied into the rock.

Tim didn't have rocks handy for guy wires, and simply pounded 4' steaks made from 2" pipe into the ground. Lots of pounding, but they seem quite solid and his 10' machine works fine with it. This may not be such a good option if the soil was loose, or wet. Up here it's dry/rocky and the soil is dense/clay like just a few inches down and it works fine.

Pictured above is a machine assembled on the end of its tower. Before we put the machine on, we need to put lots of grease on the tower stub. I also like to make a sort of 'bushing' that goes between the tower top, and the wind turbine so that the pipe stub does not wear into the top of the wind turbine.

Here is the bushing assembly we make for the tower stub. Basicly its just a cap that slips into the tower a couple inches. There is a large (1") diameter hole in the top. We put that in the tower, then we put the bronze bushing (a thrust bearing, a steel washer, or plastic bushing is also fine) over that. Then we run the wire through all that and put the machine over the top.

Thats how the same assembly shown above looks when its in the tower top. This is a good, simple/cheap solution. In the past I've put machines right over the pipe stub. They'd work fine usually for about 1 year, then the pipe would be wearing into the top of the wind turbine, sometimes all the way through - but always enough to make them stiff to yaw. This setup prevents that and should hold up for a very long time.
So those are just some thoughts and experiences with towers. Again, it's worth considering the scope of the project before you start. The tower is at least half the project if you're building your own system, and it's best to resign yourself to that fact from the very beginning. It may even be wise for some folks, to build the tower first! Seems like a lot of people build their wind turbines and never get around to the tower part. In my opinion -the tower is the hard work, the wind turbine is the fun part. Up here oftain times we have a bit of a 'tower raising' party - it can go quickly and be lots of fun if you can rope a few freinds and neighbors into it.

Below is our older page on towers, with a link to the Spanish translation. Still a good read, and still valid information.


This page is about an older project of ours. We keep ALL of our projects up on the internet for anyone that's interested...but we are no longer pursuing many of these older ideas. Before starting this project, please check our main Wind Power page to check for similar, more recent designs. These will be the top of the list and flagged with an "active project" tag. If you have any questions about what is current and what is not, or why we no longer work on certain designs, first check out our Wind Turbine Evolution page for a detailed history of how our designs have changed over the years. You can also Email us and we'll fill you in as our email volume permits...check the Evolution page first.

Para Español, traducción de Julio Andrade.

A strong tower is essential for any wind generator, otherwise it will come crashing to the ground. Plan on spending at least as much on your tower as you did on your wind generator, if not more. Since a tall tower is a rather immobile structure, make sure your location is good! Your wind generator should fly at least 30 feet above any obstructions within 300 feet. If you can't do this, keep in mind that turbulence caused by nearby object will rob you of power, and cause much more stress on the mill...turbulent winds make the machine yaw violently, which put a huge amount of strain on the fast-spinning blades. If you are low on funds for your tower, you can still homebrew an inexpensive version-- we've done it many times. Check out our field-expedient tower at the bottom of this page, made from a fresh-cut stump and a lodgepole pine.

Tilt-Up Towers

We are very fond of tilt-up towers around Otherpower.com headquarters. One of our Dans is deathly afraid of heights, and the other Dan feels that climbing a 60 foot tower is neither fun nor conducive to a long and healthy life. Therefore, this page will concentrate entirely on the tilt-up variety. This way, all work with tools and heavy wind generators can be done while safely standing on solid ground. Tilt-up towers can be made from wooden utility poles, steel lattice radio towers, or 21-foot sections of steel pipe coupled together.

The key features of these towers are 4 guy wires, a hinged base and a gin pole for leverage. To raise a tower, the 2 side guy wires are attached and tightened while the tower is laying on the ground to prevent lateral movement during the process, and the guy wire opposite the winch side is cut to the correct length and attached to the earth anchor to prevent the tower from falling over if it passes plumb. A winch or vehicle is attached to the remaining free side over a gin pole for leverage, and the tower is slowly pulled up. When it is plumbed with the turnbuckles, all guy wires are tightened. To lower it, simply reverse the process. This whole procedure is rather exciting, but not as exciting (terrifying) as climbing 60 feet in the air!

The diagrams below show some simple plans for a basic tilt-up tower design.


Tower Materials

  • Wood--Wooden poles can be very effective and economical. Some of our neighbors have simply used a tall tree from the forest, bored a 1 inch hole near the bottom for the hinge, built a metal collar on which to mount the wind machine, and gone right ahead with the project. None of these towers has yet failed, but the heights average only 20-30 feet. I would be leery of this method with a higher tower! A straight, treated utility pole would make for a much more permanent tower. These are fairly easy to find in 20-30 foot lengths, and can be found (with difficulty) in more useful 50-60 foot sizes too. Topping, limbing and guying a tree has been suggested to us, but we don't recommend that either--trees will eventually rot, they are hard to climb, and sway too much in the wind.
  • Metal Pipe--This is my personal favorite. I've had great success using 2 inch galvanized steel water pipe for towers. The maximum recommended height for a 2 inch water pipe tower is 42 feet, which is 2 pieces of pipe. Attach another set of guy wires at the coupling between the two pipes. Also, it would be wise to make couplers between each section that extend into the pipe on both sides for added strength.
  • Steel Lattice--These towers are very strong and lightweight, but expensive if purchased new. Used lattice towers can sometimes be found in rural areas, or through ham radio enthusiasts. Though generally not designed for tilt-up use, the base can be modified to be hinged. Contact Lake Michigan Wind and Sun to learn more about this conversion, and for prices and availability of used and new towers. You'll be pleasantly surprised at how little lattice towers weigh--a typical 10 foot section weighs less than 80 pounds!

Foundations

A wind generator foundation must be very strong, especially the hinge. If your tilt-up tower, foundation, or hinge is not strong enough, you will probably find out during the erection process when the entire mess comes crashing to the ground! That is the only time when there is a great deal of sideways stress on the base--during raising and lowering. Pouring a concrete foundation that extends down below frost line is highly recommended. I have successfully used 1/4 inch steel hinge brackets embedded directly in the concrete. 1/2 inch steel plate would be better. See the diagram below for details.


Earth Anchors

Your earth anchors for the guy wires must also be very strong--they have to resist the lateral thrust that is put on the windmill. As your propellor rpm increases, the blades act more and more like a solid sheet of plywood sitting up in the wind. There are a number of different earth anchors that can be used; a rugged mountain installation in the rocks might require a couple of different kinds. Generally, anchors are designed to utilize the weight and shear strength of the surrounding soil to help hold them in place.

The radius of your guy wires should be between 50 and 75 percent of the tower height. It is very important to lay out your 4 anchor foundations perfectly perpendicular to each other around the tower foundation--otherwise, the 2 side guys will not stay tight while raising and lowering the tower. Leveling is a an issue too. If the guy wire pads are at different elevations, you will run into the same problems with loose and tight guy wires.

Use the highest quality turnbuckles that you can find. Try to find turnbuckles that have removable bolts at each end to hold the guy wire in. Use the thimbles that come with your cable clamps to avoid fraying the cable. Avoid turnbuckles that have hook ends--if you can't find them with bolts or solid loops, be SURE to using baling wire on each hook so nothing pulls loose during raising or lowering.
We recently learned a good lesson about guy wires--fortunately it was not a hard lesson! When fastening your guy wires with Crosby U-shaped cable clamps (see photo), make sure to use enough clamps on each connection (3 is recommended), orient them correctly, and tighten them VERY hard! The clamps should all be oriented the same way, with the forged saddle on the live end of the cable. Remember the saying..."Never saddle a dead horse..." don't ever put the saddle of the clamp on the dead end of the cable!


Fortunately we learned this lesson while building a washtub bass for our bluegrass band, and NOT while erecting the windmill! Had we not learned this from building the bass, we would not have oriented the clamps correctly or tightened them enough. We used a length of 3/32 inch aircraft cable for the string, and fastened it at the peghead and at the washtub with cable clamps. But every time we tightened the string enough to play in the key of G, the cable clamps slipped. After about 4 tightenings and the addition of more cable clamps, success was achieved. But it was sure better to find out about these clamps on a bass instead of a windmill! Click HERE for more information about our washtub bass...it's a great instrument that's easy to play with no musical knowledge--all you need is a good ear and strong arms and legs. It's also a bit of an aerobic workout to play, as you raise and lower the pitch of the single string by pull and pushing on the neck while bracing the tub with your foot. And sorry for the diversion....back to the topic now!


  • Concrete--This is the all-around strongest solution. The hole for the concrete should be bell-shaped, so it is wider at the bottom than at the top--this allows the soil over the anchor to help hold it in place (see diagram below). A metal loop for the guy wire can be embedded directly in the concrete, preferably at close to a 90° angle from the attachment point near the tower top. Your footing should extend down below frost line. If you set an auger with a plate into concrete, the end should point toward the tower...In other words it should be parallel to the guy wire.
  • Augers--If your soil has good shear strength (i.e. it is not loose, dry and crumbly) you can purchase earth augers to anchor your guy wires. These metal rods have an angled plate at the end that allows you to screw it into the ground. Again, they should be angled into the ground so that they are parallel with the guy wire.
  • Rock Anchors--We have successfully (so far!) anchored guy wires directly into large rock outcroppings using a homemade 'piton' made of rebar. Drill a 3/4 inch hole in the rock with a hammer drill, again angled away from the windmill. Pound in a #6 rebar and weld a loop for the guy wire on the end. Epoxy in the hole might also help. Our first version used #4 rebar and seems very strong, but a larger diameter would be better.
  • Fence Posts--Metal T posts can make fast and easy earth anchors for 20 to 30 foot towers if you can pound them in deep enough. If not, we have successfuly dug out around the post and poured in concrete for a very strong anchor on a 30 foot metal pipe tower. With fence posts, they should be angled into the ground at 90 degrees to the guy wire.

Vibration

Windmill towers are subject to all sorts of vibration. The propellor, changing wind direction, generator noise, and effects of the wind directly on the tower can cause all sorts of harmonic vibration, some audible and some not. Be sure to Loc-tite® all bolts on the tower. If harmonics are causing problems (such as a swaying metal pipe tower), the problem can sometimes be fixed by changing where the guy wires attach to the tower, or by adding extra guy wires farther down the tower.

Field Expedient Windmill Tower

One of our Dans was running into some serious power problems...his batteries (inherited from the previous owner of the house) were trashed, and the new Starband satellite uplink through which we run our website draws about 300 watts. He needed more power, and fast! He didn't have time to build a proper tower, and the ground was frozen solid, eliminating any possibility of digging or pouring concrete for a foundation or guy anchors. Pictured is the result--Dan cut down a live tree, and carved the stump into a hinged base. The tower is a lodgepole pine that was standing dead, and the hinge pin is one inch pipe with another smaller pipe inside it. Two of the guy wires are anchored into rock with pitons made of 1/2 inch rebar, the others are guyed directly to the bases of live trees (he tried metal fence posts, but the ground was too rocky and frozen to pound them in). This tower is intended as a temporary measure; the windmill involved is one of our homebuilt models made with minimal monetary investment, so it's not a great loss if the tower fails--we'll chalk it up to a learning experience!

Hinged base made from tree stump

Related Posts Plugin for WordPress, Blogger...